The Guides
Ridge Traverse
- Segment 1: Lake Como Road to Mosca Pass
- Segment 2: Mosca Pass to Music Pass
- Segment 3: Music Pass to Fluted Peak
- Segment 4: Fluted Peak to Hayden Pass
- Segment 5: Hayden Pass to Salida
High Route
Additional Routes
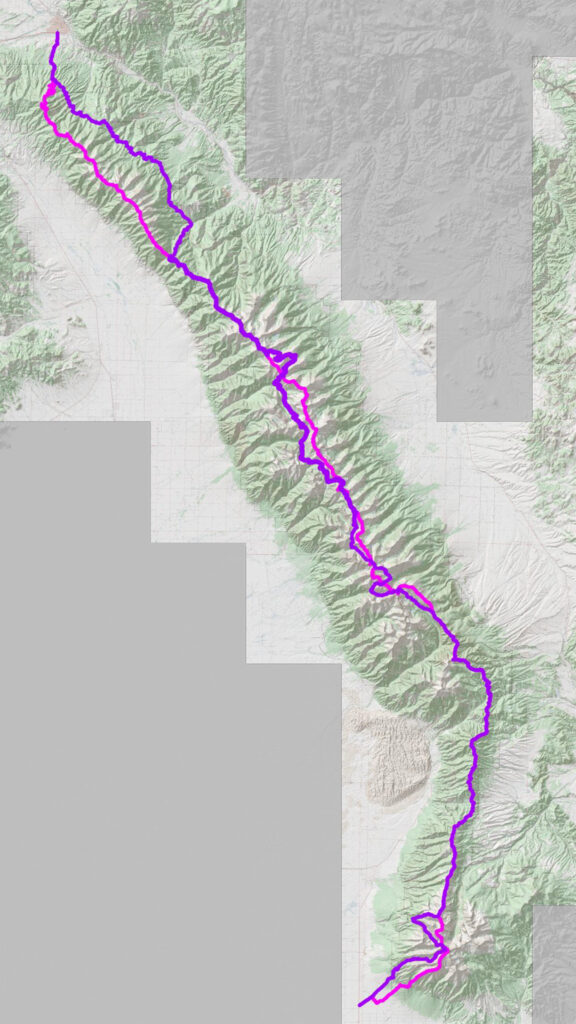
Caltopo Map
What is the Sangre de Cristo Range Traverse?

The Sangre de Cristo Range is a subrange of the greater Sangre de Cristo Mountains between Poncha Pass near Salida Colorado in the north and La Veta Pass near Fort Garland, CO in the south.
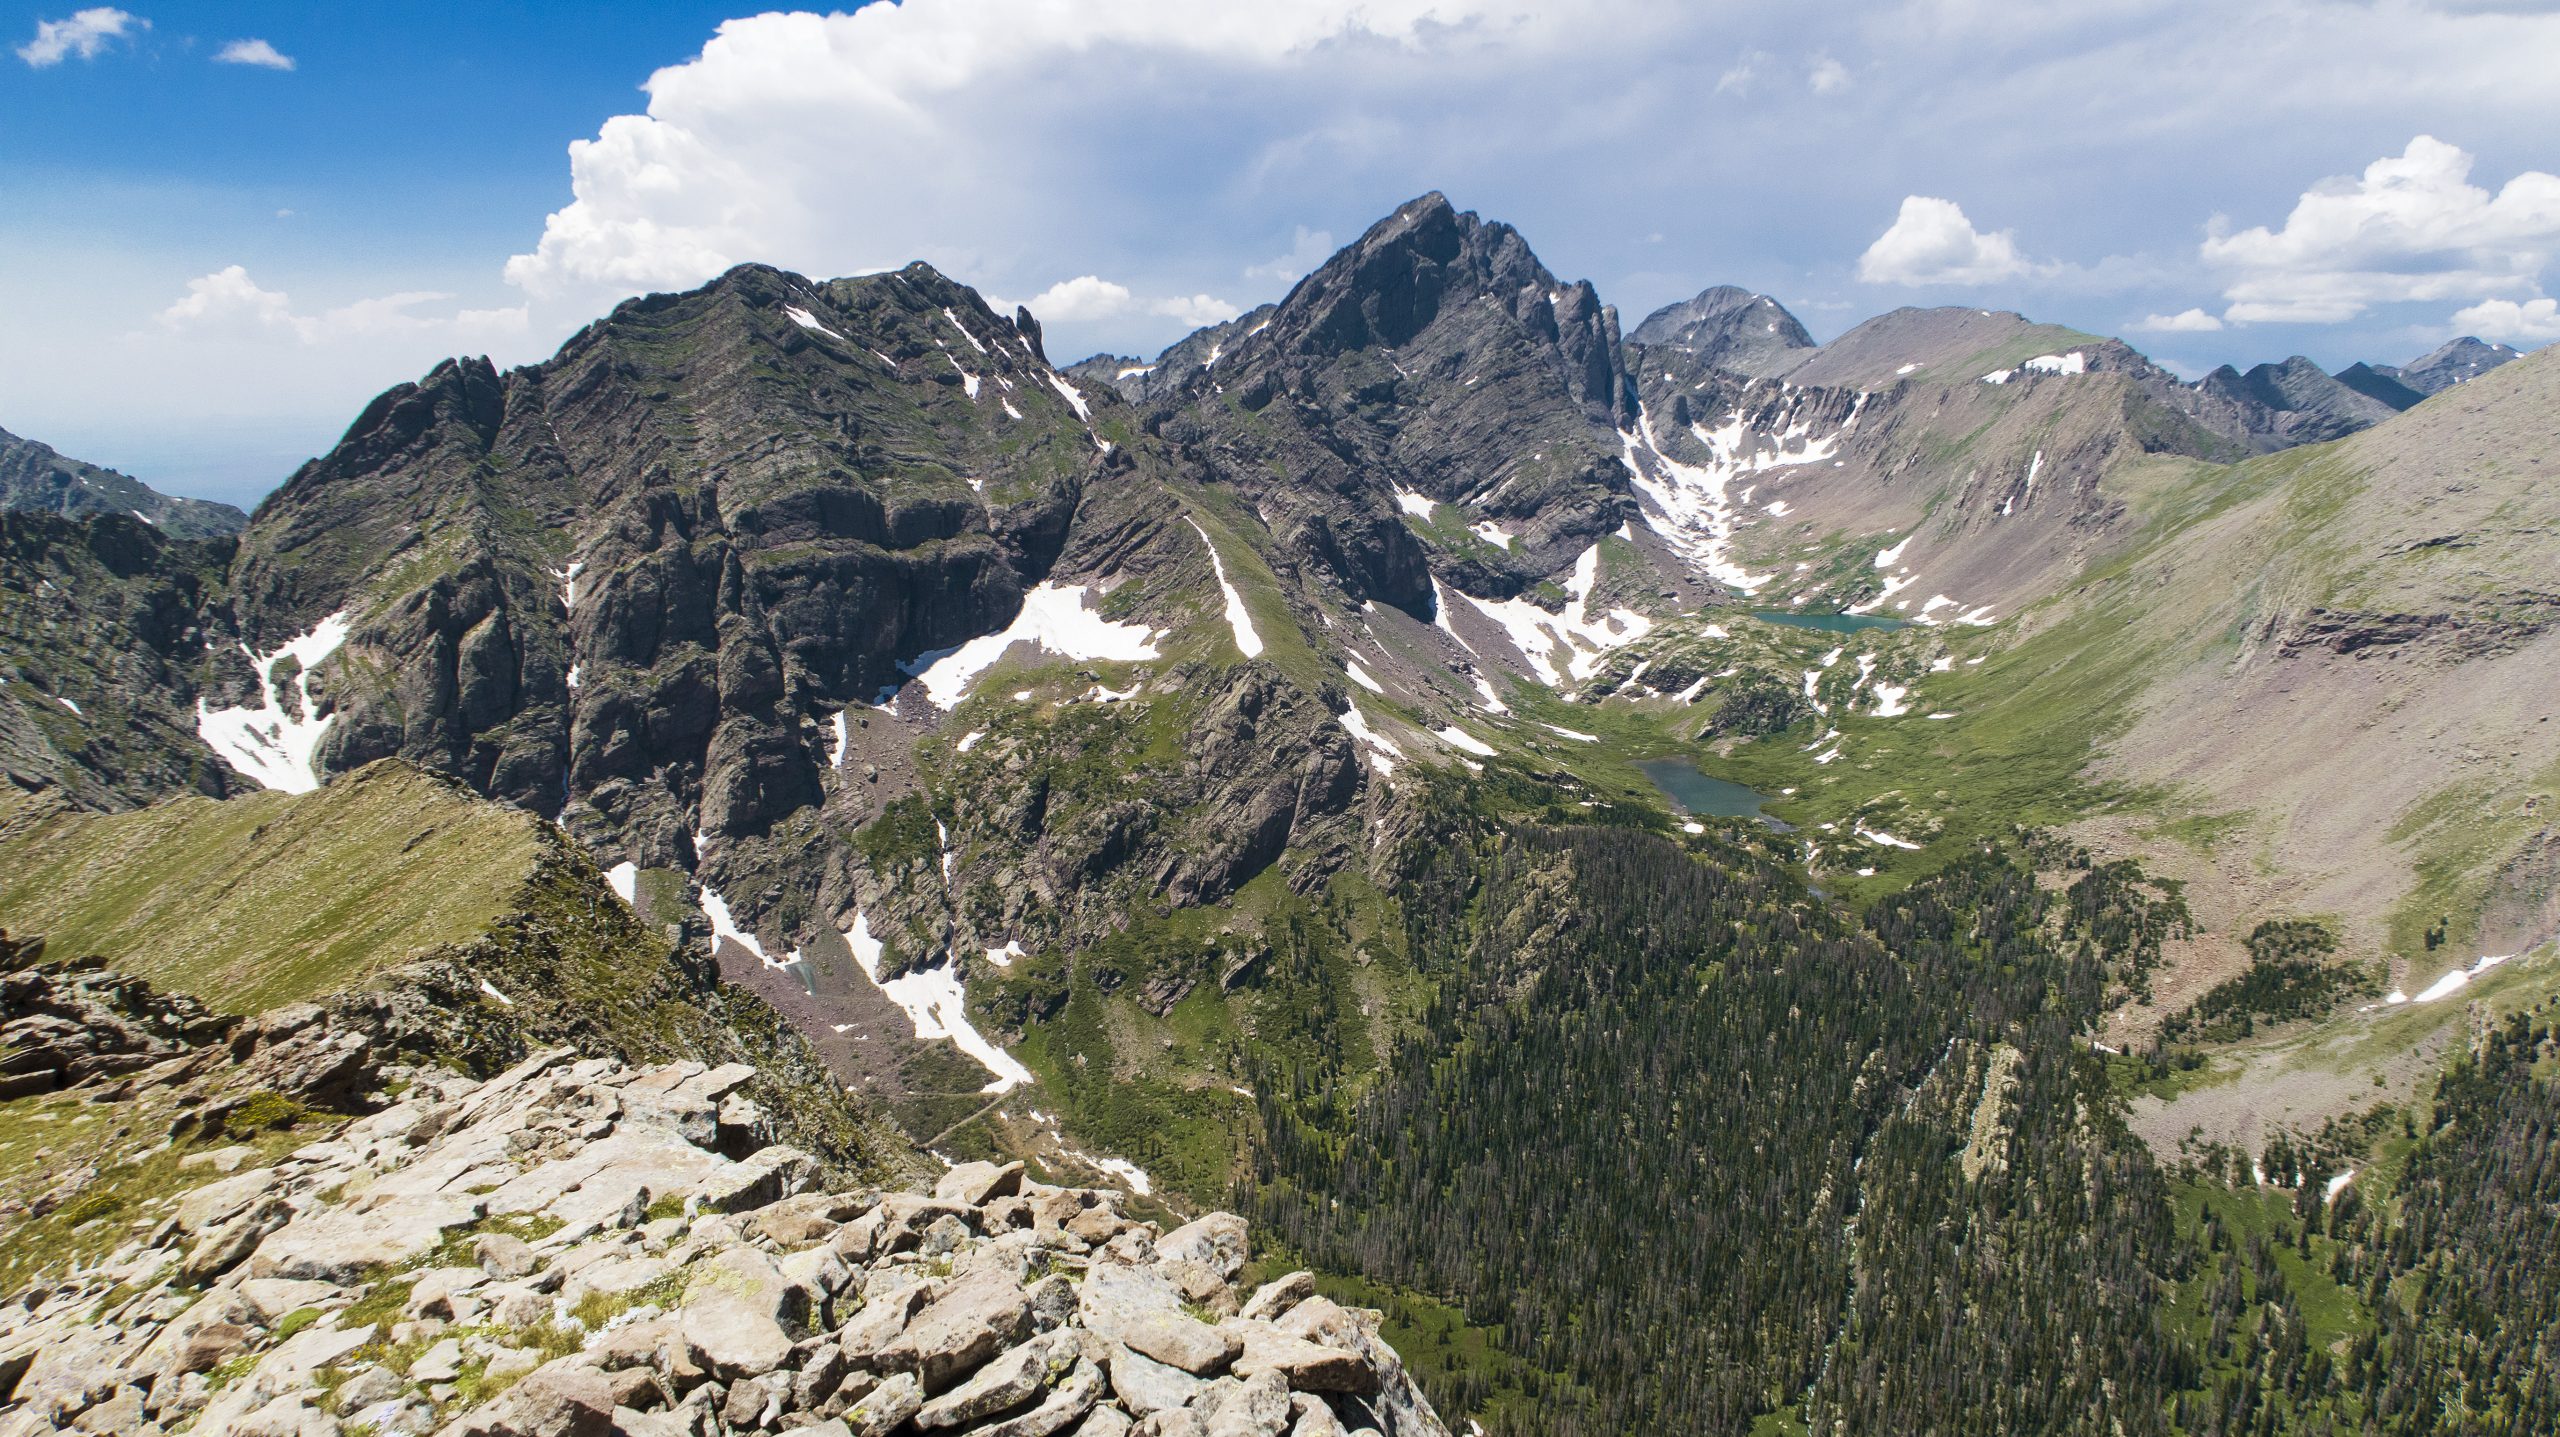
Between these two passes lies an incredible expanse of mountainous Wilderness terrain. The main spine of the Sangre de Cristo Range rises extremely abruptly from the surrounding basins with few foothills or other mountains in front of it.
In only 75 miles of ridgeline there are over seventy peaks with at least 300 feet of prominence. One can look up from anywhere below these mountains and just dream of traveling over this high ridgeline from one end to the other: The Sangre de Cristo Range Traverse! This guide is written to help you achieve this dream.
Complementary to this is the Sangre de Cristo High Route: a more backpacking-friendly route that also travels across the range, but eschews much of the scrambling and technical climbing, while still keeping you up high.
What The Sangre de Cristo Range Traverse Guide Covers
This guide covers how one would actually traverse across the range via the main ridge: common start/ends points, a general idea of the terrain you’ll pass through including YDS grading of cruxy areas, water sources, bivvy sites, and some bailout options.
The majority of this route is off-trail. Very important personal route finding decisions will have to be made to have a successful trip. The main ridgeline is not a thru hike or even a high route. Consider this a long-distance mountaineering objective with backpacking being an included element. This route includes adventure, a high degree of difficulty, and a more than an outside chance that many things will go wrong.
Real danger exists on this route which should not be taken lightly, be it from technical terrain, extreme exposure to gravity and weather, long distances to bailout towards trailheads and towns, lack of dependable water, etc.
What The Sangre de Cristo Range High Route Guide Covers
Much like the main Ridge Traverse route, the High Route guides one in covering the entire range from tip to tail on foot in a highly satisfying, adventurous, exciting and fulfilling way.
The big difference is that the High Route is not obsessed with you summiting each and every named peak and point on the main ridgeline, but rather guides you around — sometimes circuitously — more difficult terrain to keep the entire route at most Class 3 in a few cruxy areas.
The High Route is still a very advanced backpacking route, despite its relatively shorter distance: in a quarter of the length of the Colorado Trail (120 miles), it still has more than half of the elevation gain and loss (50,000’+).
Route Narrative
The Route narrative will describe the route South to North, which may be the more popular, easier direction.
Sangre de Cristo Range Traverse Route Challenges
Take these challenges seriously:
Lack of Trails
Most of the Traverse is off-trail travel over Class 2 talus as well as some travel over much more difficult terrain. Have basic off-trail skills: being able to read a map, understand topo lines, how to measure distances and wear proper footwear and clothing to deal with the sometimes extreme bushwhacking (see: Blowdown).
Travel on trails is the minority. Cast a doubtful eye over any trails mapped unless this guide specifically mentions them: there could have been a trail there sometime in the past where now there’s only the idea of one. This goes for bailing off the route too. Don’t expect an easy time down, just because the map says a trail is available.
The exception to this rule are the most popular trails that are used to approach the busy 14ers: South Colony Trail, Willow Lake Trail, etc. These trails are built primarily by RMFI and are excellent. Many of the trails near Crestone are also excellent: this guide calls those trails the West Side Trail Network. The 4WD routes over many of the passes, Hayden, Hermit, Medano, Mosca, are also in great shape for hiking and could yield a lucky hitch back to town.
Some of the worst “trails” will be found north of Medano Pass.
Blowdown
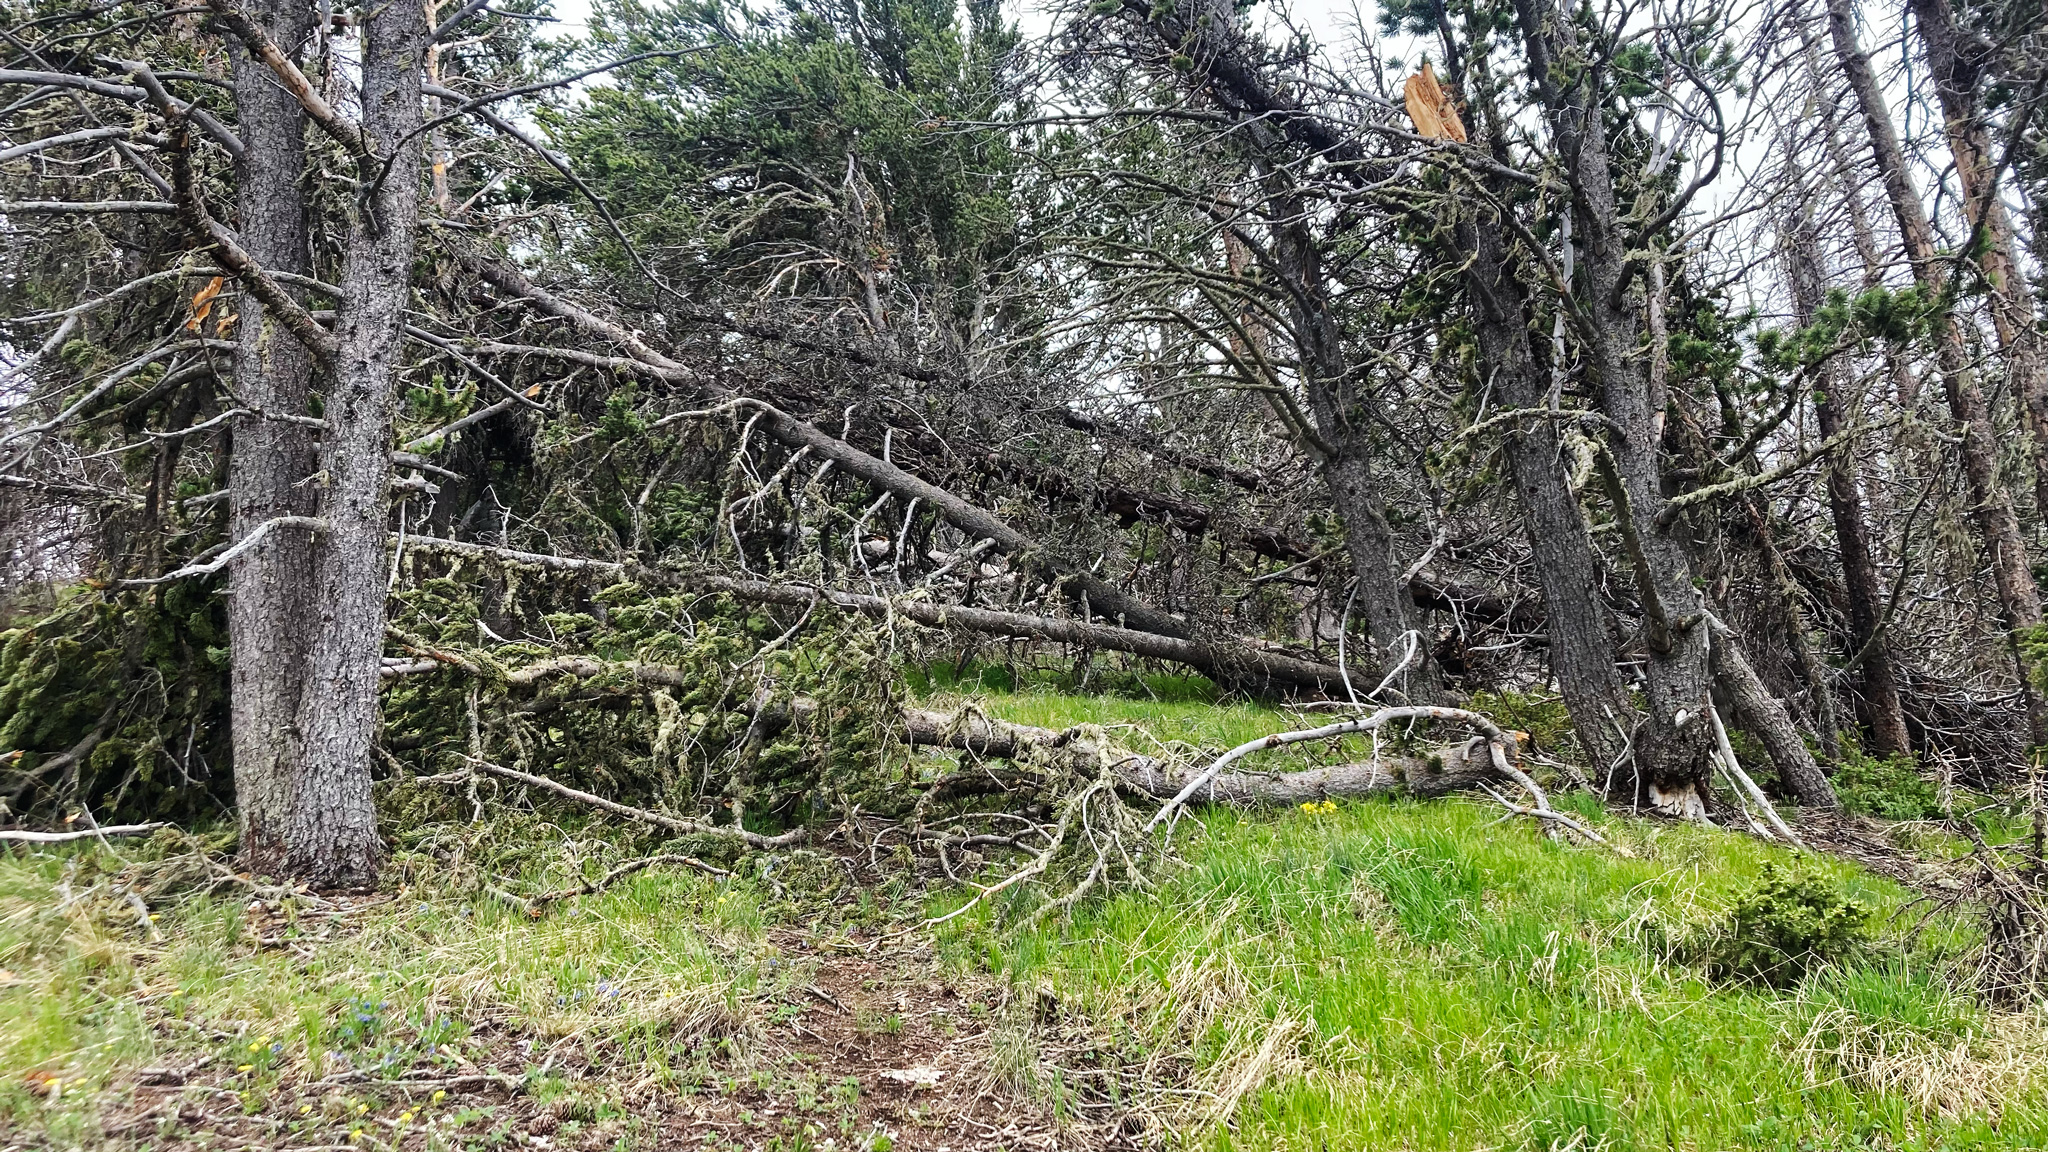
Generally subalpine travel below treeline – even where a trail is supposed to be – is difficult. Blowdown is one of the main issues: whole stands of trees will have been knocked down during an intense and violent windstorm.
Bring along an immense amount of patience and a little dark humor, as you navigate sometimes straight through what seems like a never ending sea of tree trunks with sharp, pointy branches.
Although there’s less blown down on the route then there historically has been thanks to forest fires that have cleaned up some areas, you cannot avoid all of it. Negotiating a blowdown area is time-consuming, and oftentimes frustrating with the chances of coming out of it with torn clothes and scratched skin being high.
You’ll experience the worst blowdown traversing Mt. Zwischen. But anytime you travel below treeline, expect blowdown and be pleasantly surprised if you do not hit it. This guide tries to keep you as close to the ridge crest as is probable with the right skills and when carrying a heavy load, but we will make slight concessions to get slightly off the ridge crest when blowdown makes travel uniquely impossible.
Altitude
The body works differently at a high altitude and this route lives at a relatively high altitude with little break for days on end. This can especially be an issue while sleeping and eating.
There’s no real magic way to prepare for the high altitude, except to stay at high for long periods of time (weeks).
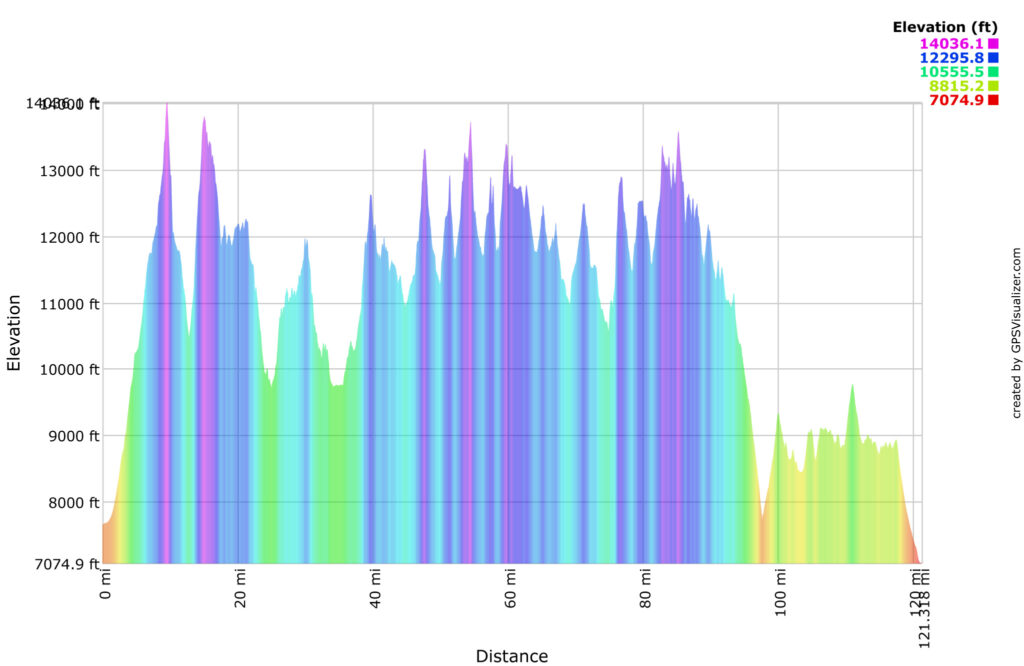
The lowest elevation of the route is at Salida, CO at the northern end at around 7,000’, but you’ll immediately climb up high to 12,000’+ before the first peak is encountered.. The highest elevation on this route is at 14,304’ at the top of Blanca Peak on the southern end of the route. Average elevation: 11,850’. Just like the northern end, the southern end stays high before precipitously falling back to the basin floor from 14,000’ down to around 7500’.
Expect most of the route to be above treeline. In fact, 41 contiguous miles above 12,000’ are found between the southern slopes before Music Pass and the northern slopes of Cottonwood Peak. Water is scarce in this section.
Five 14ers will be summited on this route: Crestone Peak, Crestone Needle, Ellingwood Point, Blanca Peak, and Little Bear Peak. A few unofficial 14er peaks may also be summited: South Little Bear Peak, Northeast Crestone, and East Crestone. Two Centennials will also be summited: California Peak and Mt. Adams.
Elevation Gain/Loss
The ridgeline of the Sangre de Cristo Range is not a high alpine plateau, but rather a line of seemingly never ending points and peaks. Total elevation gain and loss is approximately 55,000’ (each) in approximately 120 miles. This is roughly more than half of the total elevation gain of the entire Colorado Trail in about ¼ of the CT’s 500 mile length.
Above Treeline/Weather
Because so much travel is above treeline, one is vulnerable to sun, wind, rain, and even snow storms. And especially: lightning. Escape from the high point of the ridge is not always obvious or apparent, and could lead one to a more dangerous position (cliffed out). Be very wary of storms that seem to be coming in fast from a distance. Preemptively make conservative choices to take cover and/or seek a lower elevation.
Difficulty Bailing
Much of the land around the Sangre de Cristo Range is sparsely populated, and even getting to a trailhead may equate to a very long walk to a main, paved road. Only a few towns border the mountains themselves. Salida is found at the start/end point of the route and Crestone is found at approximately the midpoint. The start/end point of the southern terminus has no town near it: the town of Blanca is almost 9 miles away and there are no services at the trailhead near the highway. Mentally prepare that any bail could become a multi-day affair, including the hitch into a town.
Lack of Water
Free water on the ridge is very rare. Such water sources consist of a few creeks, springs, and free-flowing water from large snow fields. Most water you find will come from more consolidated snow fields and you’ll have to figure out a way to melt the water for consumption (stove, waiting for the snow to naturally melt, eating the snow).
More water is found in small alpine lakes off ridge, but fetching it will endow you with an elevation loss/gain penalty and the elevation gained is already very high. Consider coupling any trips with finding more sheltered camping options.
Cameling up will also be a method I would suggest you employ. It’s likely that you’ll carry 4, 5 or even 6 liters of water at a time. We’ll note the few dependable water sources on route as well as some undependable water sources we’ve used in the past, and other water sources off route. Do not play with dehydration. Caching water and other supplies is an option in key parts of the route.
Technical Cruxes
Class 2/3/4/5 terrain will need to be negotiated to stay reasonably on the ridge. Rock quality is generally good, but any mistakes, slips, and/or falls may prove deadly. You will want to have a reasonable amount of scrambling/climbing experience before venturing out.
The two large areas of technical climbing are between the summit of South Little Bear Peak and California Peak (5 miles) and between Milwaukee Peak and Fluted Peak (12.5 miles!), with many shorter scrambles peppered about. Many of these technical cruxes can be missed, which we’ve described in the High Route as well as described when the Ridge Traverse and High Route meet, share terrain, and diverge from each other. The Ridge Traverse will give more precedence to guiding you on staying on the ridge, while the High Route allows you to stay up high, without requiring anything harder than a few Class 3 cruxes.
Wildlife Encounters
All manner of fauna will be found on route for those that are lucky: deer, elk, big horned sheep, bear, mountain lion. Generally these do not cause too many problems, but securing your bivvy site before you wink out is not a bad idea.
The worst wildlife by far will be the mosquito. We suggest treating clothes with Permethrin, and perhaps bringing some sort of bug repellent/netting.
Solitude
It’s not out of the ordinary to travel this route without seeing another person for days. This can be attractive to some and a turn off to others. But you will not be able to count on the kindness of strangers to bail you out of a sticky situation. Practice self-reliance. Although most completions of the full Sangre de Cristo Range Traverse have been done solo, going with a partner (or two!) will ultimately make for a much safer trip.
Places where solitude is less likely are around the most popular 14er Peaks: the Crestone group and the Blanca group.
Experience
This route isn’t for everyone.
Before considering this route, be honest with the type of experience you bring to it. It’s suggested that you have already completed something akin to the following:
- Backpack a long trail, like the Colorado Trail, CDT, PCT
- Extensive hill walking
- Solo up to 5.6 (and beyond)
Before completing his own traverse, the author was comfortable soloing 5.6 in the Flatirons near his home in Boulder, CO, he had completed the Colorado 14ers twice over, had raced a mountain bike on the Tour Divide, Colorado Trail, and Arizona Trail, and had helped guide backpacking trips in the Brooks Range, AK, the Sierra in CA, and near his home in RMNP, CO.
Sangre de Cristo Range High Route Route Challenges
Challenges of the High Route are much the same as the Ridge Range Traverse, except for the following:
The technical cruxes are much easier, and are replaced by much more on-trail travel. This dramatically lowers the experience requirement, removing the necessity to be comfortable as a climber. One still needs to be comfortable scrambling at Class 3 with a loaded pack, as you will reach points where this is required to continue on the route. Some of the main crux points will be found:
- Descending Ellingwood Points C2 Couloir
- Descending “Spread Eagle Peak”
- Descending Cottonwood Peak
Be ready for all other challenges talked about above.
General Bailout/Resupply Points
If you have access to a 4WD vehicle (and time), there is opportunity to drop food/water/gear caches on some of the passes that cross the range. We’ll note these.
Skipping Peaks
Many peaks can be skipped easily and safely on the Ridge Traverse, We’ve developed the High Route to complement the Ridge Traverse to basically accomplish just that. Feel free to take the Ridge Traverse or the High Route as you prefer: it’s your hike.
Trip Time Estimation
The relatively short distance of the route – 100 to 120 miles – belies just how slow and difficult travel can be.
For a full meal deal, stay on the ridge at all costs, no caches, unsupported trip, it’s not suggested that you take more than 7 days to complete. This is beyond the ability of many hikers and climbers, so consider breaking up the trip into sections that you complete over several smaller trips.
The town of Crestone makes a good halfway point and a demarcation line between the mostly Class 2 talus hopping to the north, and much more technical scrambling to the south.
For whatever style trip you intend, consider using elevation gain/loss as your primary limiting factor. For a seven day trip, over 7800’ will need to be gained (and essentially: lost) every day, which is more than most people’s daily elevation accumulation on other, easier routes. Plan days according to your estimated daily elevation gain and adjust depending on your actual daily totals. Mileage and Elevation gain is labeled on the Caltopo Map.
Backpacking Gear Considerations
Oftentimes ultralight backpackers prefer lightweight gear choices to make their trip faster and more enjoyable. Given the incredible amount of elevation gain and loss of the this route, we suggest only packing what’s needed without impacting safety, to keep your pack weight low for making the off-trail segments more doable. Careful selection is needed. Aim for a sub 10 lb. summer base weight, then sufficiently supplement for colder nights, higher elevation, and freak thunder/sleet/hail/rain storms. Do not camp above tree line unless you have a proven sleep system that you know will survive (and allow you to survive!) such a high camp.
Technical Climbing Gear Considerations
Class 5 climbing will be found if your goal is to stick close to the ridgeline. Generally, this would involve rope, harness, climbing protections, rock shoes, etc. Such a haul could make moving efficiently on the ridgeline much slower, so it’s suggested to only attempt these sections if one is comfortable in doing so without much – or any – of this gear. You can also consider bringing it only for the segments that require it (Segment 1, Segment 3).
An ice axe can also be handy for the snow climb that is found on this route, primarily descending the NW Couloir off of Crestone Peak.
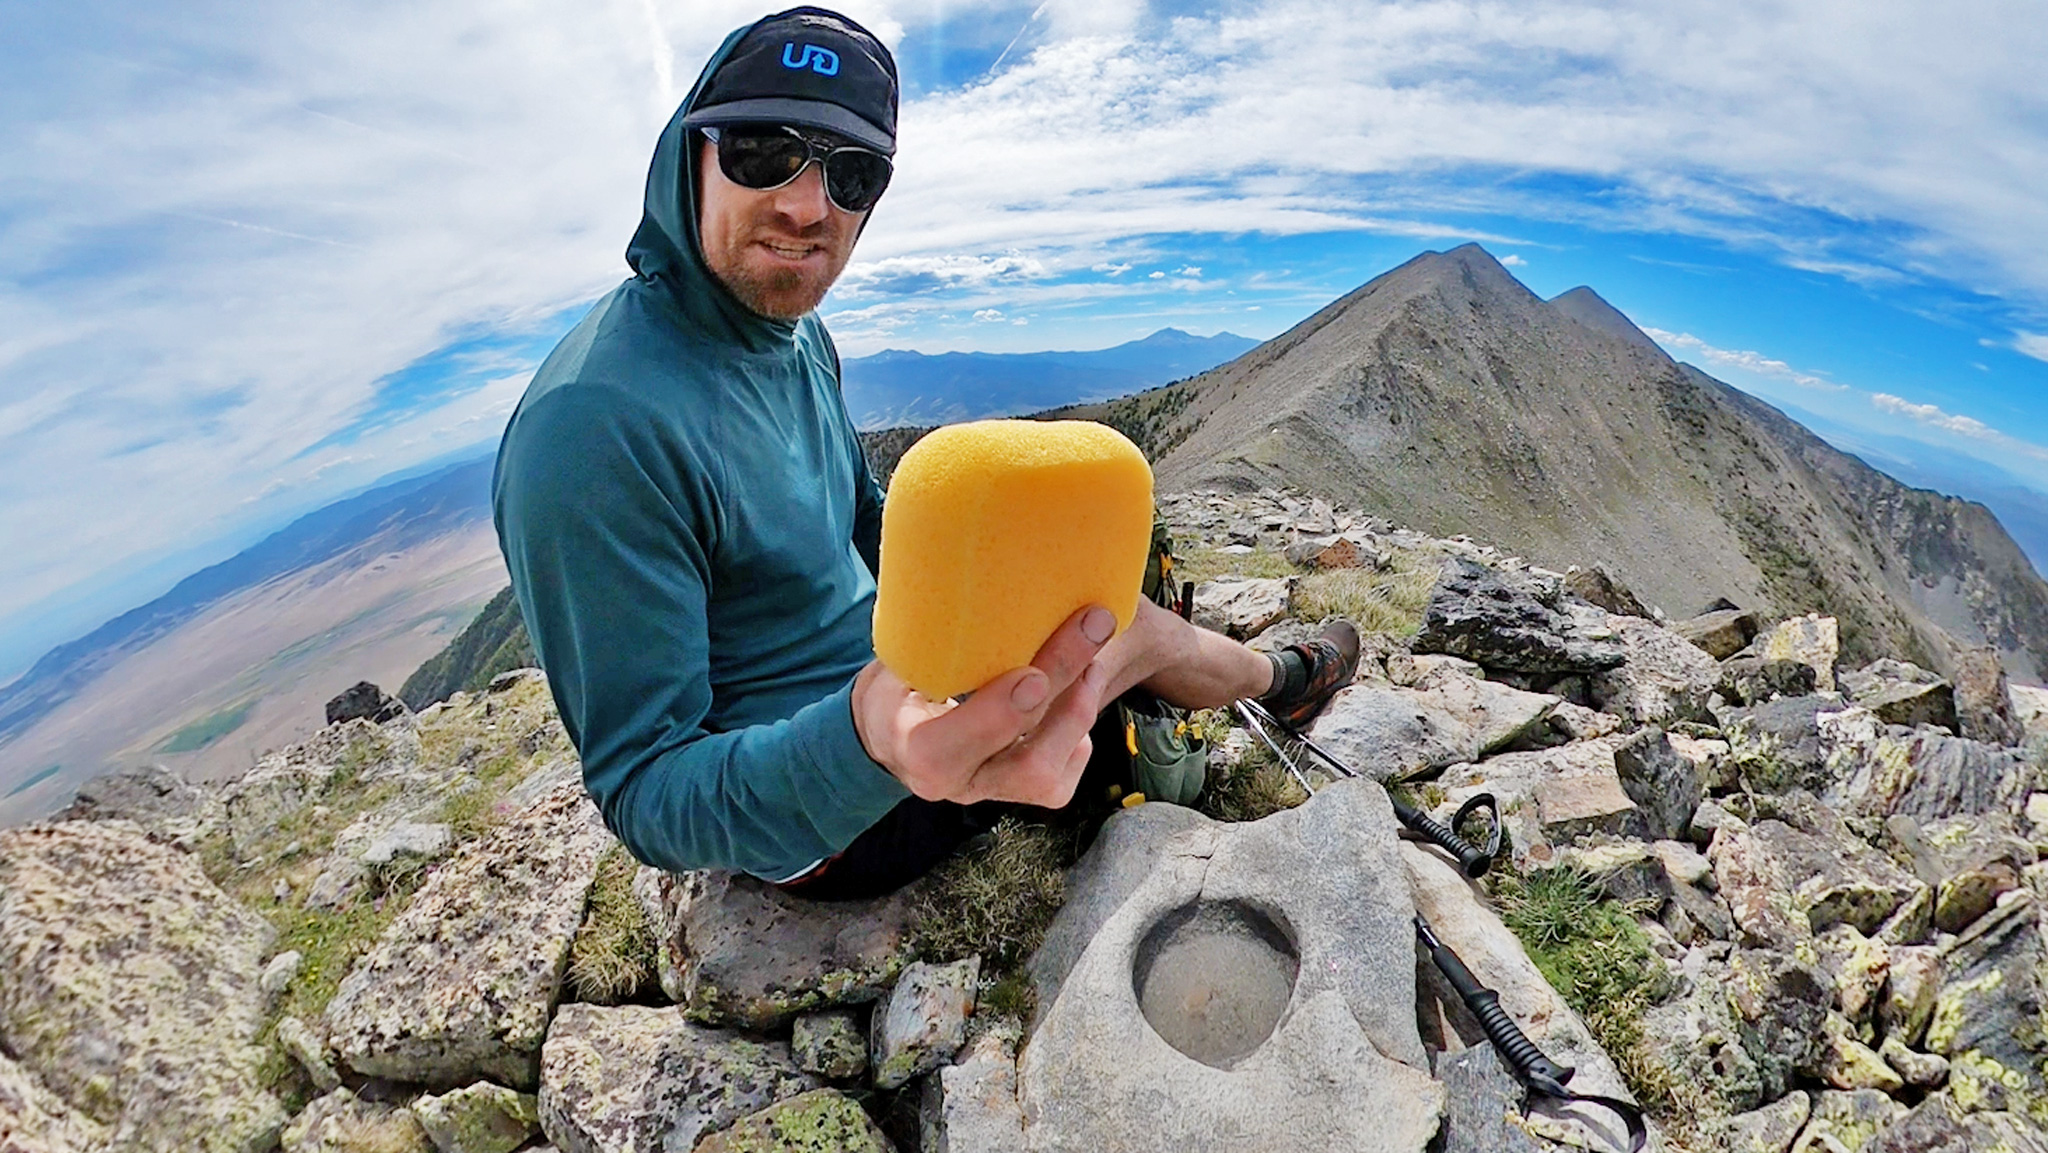
Sun Protection
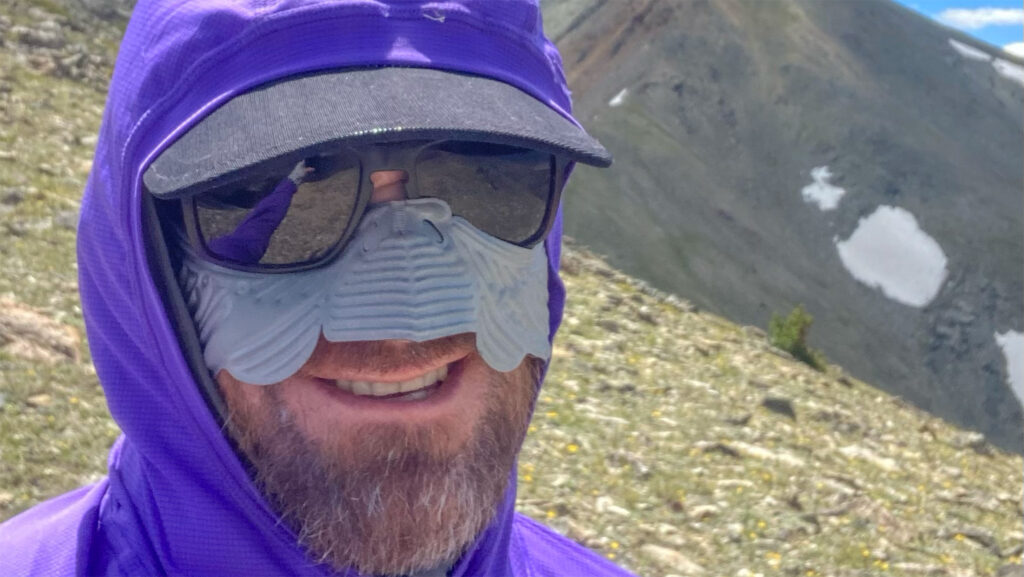
The high altitude, rarefied air of Colorado is also very intense in the solar energy that reaches the surface of your skin. Consider wearing sun protection-specific clothing. Temperatures can get into the 90’s at the lowest elevations of the route. Natural cover can be hard to find in the miles and miles you’ll be above treeline. Below treeline, water is hard to come by and it’s easy to overheat.
Warmth and Insulation
Remember it can snow any day of the year in Colorado, and you’ll be traveling above treeline for hours on end, and topping out at 14,000’+, five different times. Nights can get down to the 30’s, even on days that reach 90F.
Shelter and Sleep System
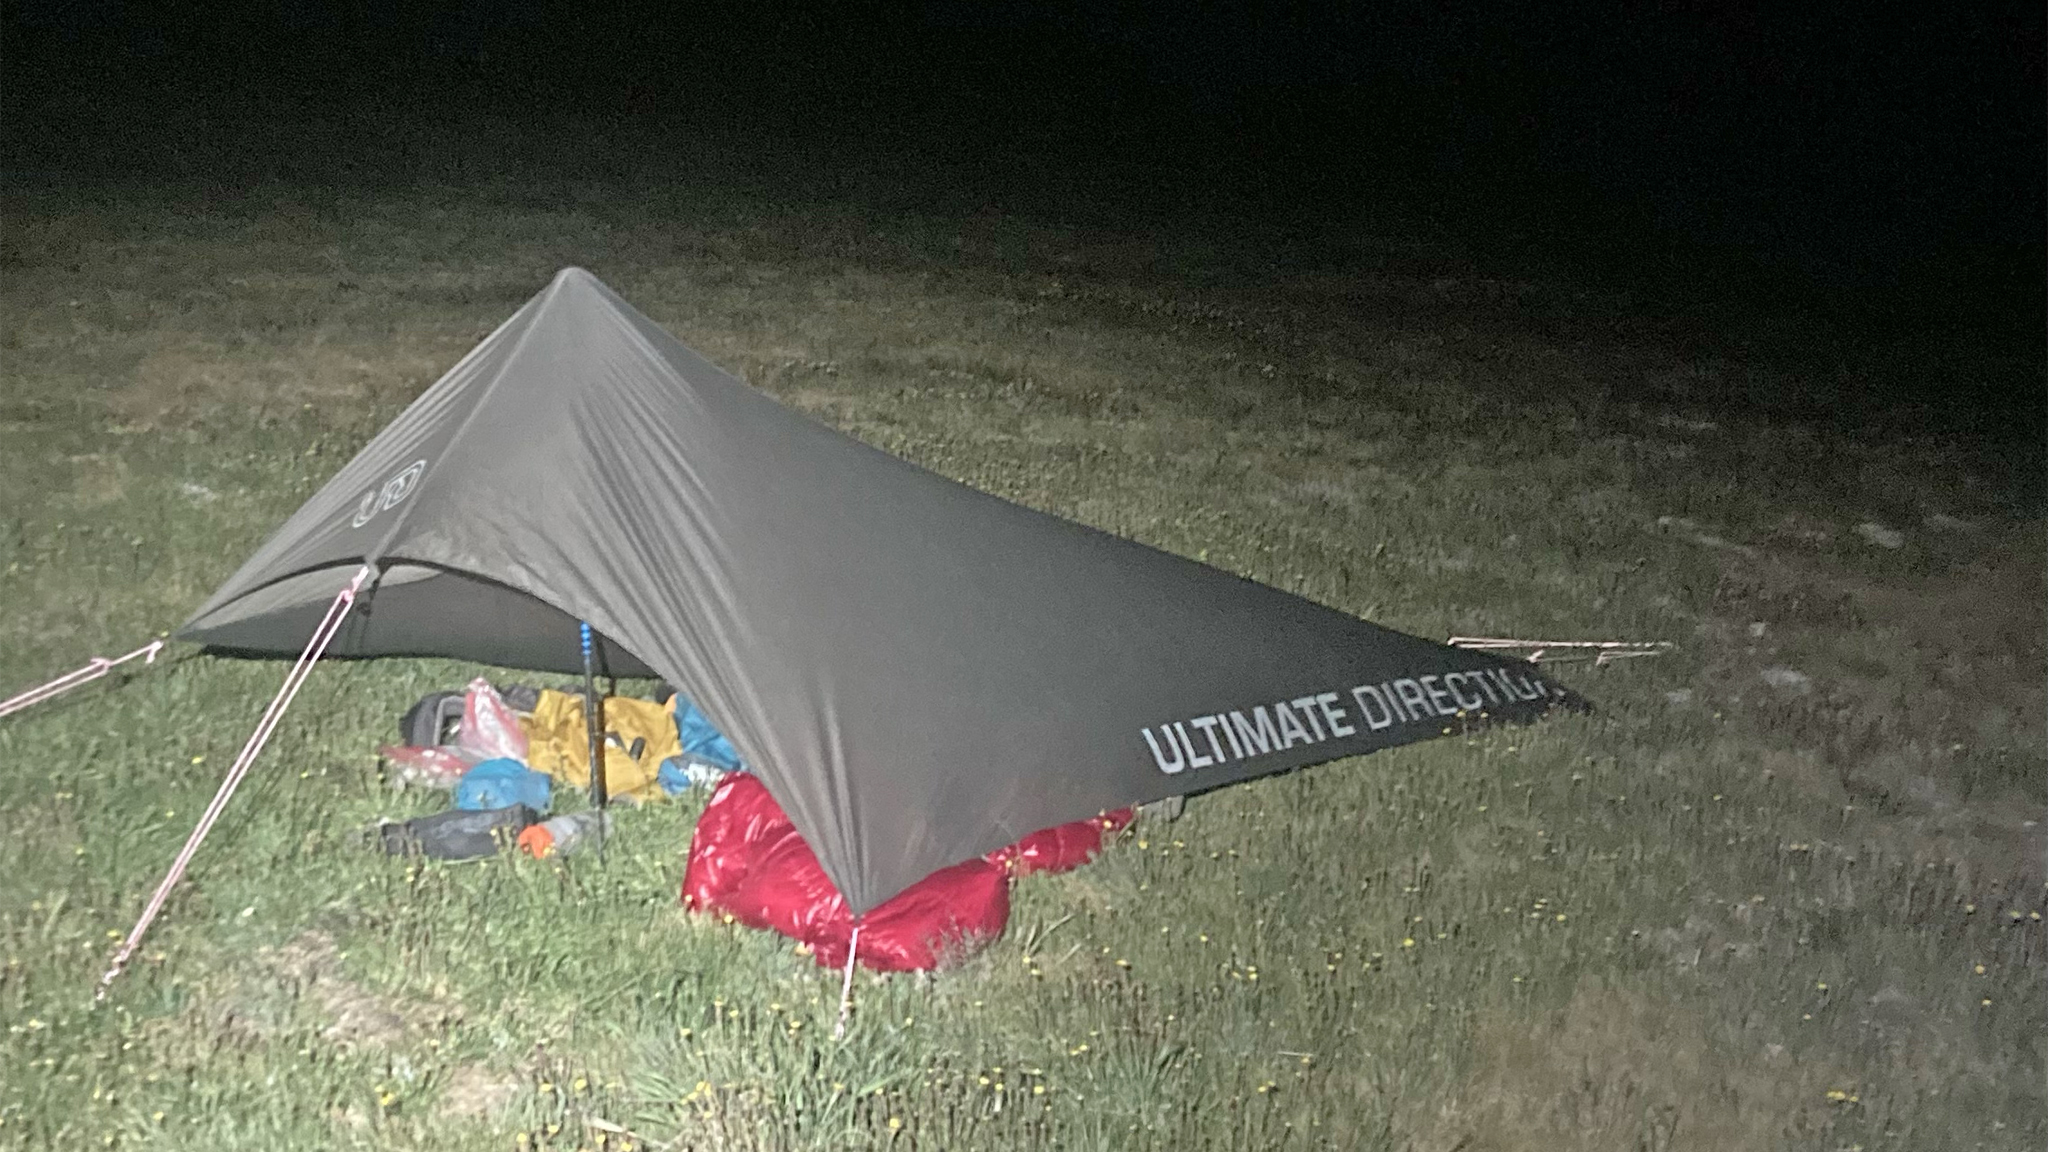
We would suggest bringing a water-resistant bivvy, a simple and flexible waterproof shelter (tarp) that can be set up in variable terrain, and a sleeping bag with a limit rating of at least 32F.
Unless conditions are perfect, we do not suggest bivvying above treeline, especially if you’re not completely familiar with the area. Do not expect five star camping on the ridgeline. We use the term, “bivvy” strategically, as often you’ll be sleeping on top of essentially: talus on a small area of ridge that’s only long, wide, and flat enough for one person to lie down. Wind storms that can rip a tarp to shreds are a threat.
Below treeline, options get a little more realistic for a more normal camping experience, but oftentimes are dry.
Water Treatment Options
Water quality in the Sangres is generally quite good, but we do suggest treating all water found on the route, even though you will not always be passing through very high use areas. Aquamira is an excellent option. Filters are also popular – just be careful when storing them when not in use, as freezing temperatures can damage the filter in ways that aren’t easily noticeable when using the filter.
Sangre de Cristo Range Traverse Season
Timing is vitally important for a successful traverse. If your goal is to stay on the ridge as much as possible, you’ll need some snow available on the ridge, while not having that same snow impede travel too much. Depending on snowpack, a trip in early to mid July may be perfect. Successful trips have been done into September, although others in that month have been thwarted by an early season snowstorm. The season can be extended if you are relying on cached food, water. Aim to have your trip during a time of high pressure where no monsoon systems are predicted.
The High Route season may bleed into Fall a little longer.
Traveling Mountainous Terrain in Colorado During Monsoon
Do not get stuck above treeline during a lightning storm. Since the main route of this guide is on a ridge, above treeline, you’ll need to admit that you will be doing something seen as very foolish to do in Colorado. Your only saving grace is that any storms that blow through are easily spotted well beforehand, and time will be available to make a decision to descend to weather it out. Do not make these decisions too late!
Leave No Trace
Subalpine and alpine terrain are delicate.
Tundra that’s been trampled on can take many years to bounce back. Human waste left above treeline may never properly decompose. Be extremely mindful of your impact while on route, and practice Leave No Trace ethics as you travel through the route.
The great majority of off-trail travel above treeline in this guide will be on talus – a reasonable and durable surface for hiking. We’ll note any areas where we feel extreme care will be needed.
Getting to the Start/Finish and All Points Between
The northern terminus, Salida, has easy access both by car and by public transportation. Indeed, the Bustang service picks up/drops off mere blocks away.
No such convenience is found in the southern terminus at the Lake Como Trailhead, and you’ll have to be dropped off, hitch, or call a taxi from one of the surrounding towns. Taxis can be called using the following:
- Little Stinkers Taxi Service: 719 589 2500
They will drop off at Lake Como Road TH from Alamosa.
The town of Crestone also has no public transportation, but a Bustang stop can be found in the next town over in Moffat, CO – around 12 miles away. Walk or hitch (should be very easy). There may be expensive private shuttles that are also available. The Bustang bus arrives early in the morning towards Salida, so your best bet is to stealth camp at the local park by the bus stop.
Thanks and Acknowledgements
Traversing this incredible line was not an original idea of my own – it may be one of the most obvious objectives that sprouts into one’s mind to anyone who travels CO 17, looks east and wonders if the ridge actually goes. I do claim to have been one of the first to have completed a solo, unsupported trip started from both the north and south — and certainly the first and only to have done it in both directions. Below are some other trips that have inspired me to take my own trips and have lent inspiration and beta to the below guide:
- The High Lonesome: Brendan Leonard, Jim Harris (redux)
- Nick Clark and Cam Cross’s 2018 Trip Report
- Hannah Green, 2022
About the Author
I’ve had the extreme privilege of completing this route twice – once from each direction. This guide is a collection of my notes put into some sort of organized form. It is my opinion that this is one of the most incredible long-distance routes found in Colorado. It’s certainly not for everyone, but for those who have the endurance and technical skills, it’s hard to beat. Find me at:
Contact
Contact me here for questions and to report errors in the guide.
Updates
- 6/30/24 – Caltopo Map has been updated! The changes in the narratives for the Northern Sangres Loop are now reflected on the map
- 6/21/24 – Expanded upon Segment 5, as well as the Northern Sangres Loop – the Caltopo map will be updated soon to better match the narratives.
- 6/16/24 – Added the Crestone Sangres Sampler Route
- 6/15/24 – Added the Northern Sangre de Cristo Loop Route
- 6/15/24 – Added photos, mostly on Segment 1-3